
Supplies Needed
1 tube of choice – I
used the fantastic artwork of Medievil. You
can visit her site here. The particular
artwork in this tutorial is part of the Commercial Use portion of this collab
and can be purchased here.
Font of choice – I
used Broadway – it came with my program
“Jersey Girl’s” is a full
size scrap kit created by Cindy of Cindy’s Creative Designs. It is part of the TKO Collaboration and can
be purchased here. You can visit her blog here. Thank you Cindy for
your portion!
This tutorial was
written assuming you have working knowledge of PSP.
~♥~ Let’s get started ~♥~
Open up the template.
Shift + D.
Close out the original.
Delete the credit layer.
Image/Canvas Size
600 x 600
OK
Highlight Bg layer.
Flood fill white.
Highlight Strips Right layer.
Merge Down.
All strips should be on the same
layer.
Use your Magic Wand and click
anywhere outside of it.
Selections/Invert
New Raster layer.
Flood fill with #cba365
Effects/Texture Effects/Blinds:
Deselect.
Delete the template layer.
Adjust/Add Remove Noise/Add Noise:
Gaussian and Monochrome checked
Noise: 10%
OK
Highlight Circle Noise Frame layer.
Click anywhere outside of it with
your Magic Wand.
Selections/Invert
New Raster layer.
Flood fill with #cba365
Adjust/Add Remove Noise/Add Noise:
Gaussian and Monochrome checked
Noise: 60%
OK
Deselect.
Delete the template layer.
Repeat the above step with
Rec Frame Left, Rec Frame Right, and
Rec Middle Frame layer.
Highlight Circle layer.
Click on it with your Magic Wand.
New Raster layer.
Copy and paste Paper 3 Into
Selection.
Deselect.
Delete the template layer.
Highlight Rec Left layer.
Click on it with your Magic Wand.
New Raster layer.
Copy and paste Paper 1 Into
Selection.
Deselect.
Delete the template layer.
Repeat the above step with
Rec Right and Rectangle 3 layer.
Copy and paste your tube as a new
layer. If you’re using the same poser as
I did, resize 25%.
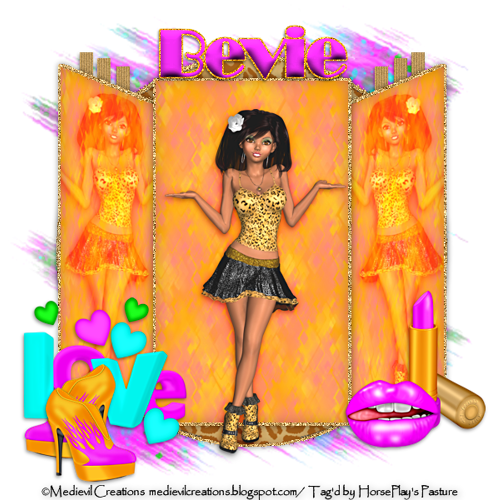
Position it in front of the center
rectangle – see my tag for reference.
Duplicate your tube move to the
left.
Tap the letter “k” on your keyboard
to activate the Pick Tool.
Pull the left side in just a little.
Pull down on the top right corner
(the bottom right corner will lift up)
Once you’re satisfied with how it
looks move it into a better position over the left paper layer.
Change the Properties to Overlay.
Duplicate
Mirror
Move into a more exact position over
the right paper.
To both tube layers:
Highlight the paper below it.
Click anywhere outside of the paper
with your Magic Wand.
Highlight the tube layer just above
it.
Tap the delete key.
Deselect.
Add your elements. I used:
Word Art 1: Resize 10%
Ankle boot 1: Resize 10% and 60%/Duplicate/Mirror
Lipstick 1: Resize 10%/Mirror
Lips 1: Resize 10% and 60%
Highlight your white background.
Select All.
Copy and paste Paper 2 Into
Selection.
Deselect.
Apply the mask.
Merge Group.
Add your copyrights.
Add your name:
Color Pallet:
Foreground & Background: #f932f9
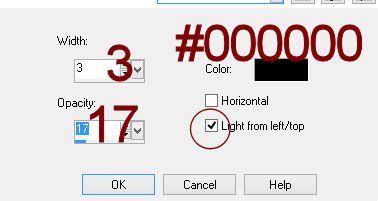
Stroke 1
Type your name.
Convert to Raster layer.
Select All/Float/Defloat
Selections/Modify/Expand by 2.
New Raster layer below the name
layer.
Flood fill with #f8a410
Adjust/Add Remove Noise/Add Noise:
Gaussian and Monochrome checked
Noise: 60%
OK
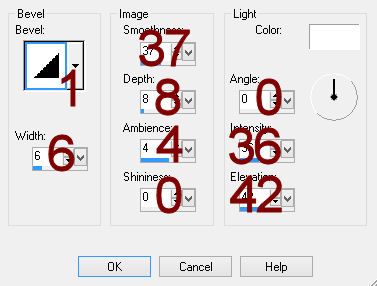
Highlight your original name layer
and give it a slight Inner Bevel:
Merge Visible both name layers.
Give it a drop shadow.
Resize all layers 80%.
I’d love to see your results.
Hugs,
Bev
No comments:
Post a Comment